Search This Shit

Tuesday, July 3, 2012

Breakfast popsicles!


I'm a genius! I've started making smoothies for breakfast every once in awhile, but I never measure anything so I always have leftovers. Thus, breakfast popsicles were born. I pour leftover smoothie batter (? would that be a batter? i don't fucking know) into my popsicle molds. Unsurprisingly, my 3 year old LOVES these. "Mama! Can I have a popsicle for breakfast?" "Of course, dear!" 


I always use frozen, over ripe bananas as the base for smoothies because I hate ice in them. The bananas make them almost like a milkshake in consistency. Then, I throw in whatever else I have laying around like protein powder, steel cut oats, other frozen fruits, greek yogurt, nut butters, etc, etc. Very easy, no recipe required!


I love the molds I linked above, by the way. They don't make huge popsicles, and they're so easy to unmold. I also love that they're individual, so once my popsicles are frozen, I can take them out of the stand and put them in the freezer laying down to save space. 

The "Shit I have 3 pears and 1 peach that are about to go bad" jam.

Peach Pear Jam (more pear than peach)


  • 3 large pears
  • 1 large peach
  • 1/2 cup fruit juice or water
  • 3 1/2 tbsp BOTTLED lemon juice
  • 1 3/4 tbsp Ball low sugar pectin
  • 1/3 cup sugar, or sweetener of choice
  1. Peel, core, and chop fruit into large chunks. Combine with lemon juice and water/fruit juice in a medium sized pot. If your fruit is soft enough, mash with a potato masher or blend to chunky with an immersion blender now. If it's still hard, cook for a bit until the fruit can be mashed or pulverized. Gradually stir in pectin, no clumping!

  2. While constantly stirring, bring fruit to a rolling boil that cannot be stirred down.

  3.  Add sweetener now if desired. Bring back to a boil and boil hard for 1 minute.

  4. Pack into hot, sterilized jars, process for 10 min. Let sit for 12-24 hours before moving the jars. Put any jars that didn't seal in the fridge and eat within a week. Makes three 8 oz jars of jam.


Thursday, May 24, 2012

Blood Orange

This is the final citrus fruit, I promise. 


MATERIALS

  • G hook
  • Worsted weight yarn in bright orange, crimson, and cream.
  • Embroidery needle
  • Fiber fill
  • If desired, magnets that are strong enough to hold through yarn.
RIND (make 2)


R1: With orange yarn, 6 SC in magic loop.

R2: Inc every ST (12 sts)

R3: *SC 1, 2 SC in next st* rep 6 times (18 sts)

R4: *SC 2, 2 SC in next st* rep 6 times (24 sts)

R5: *SC 3, 2 SC in next st* rep 6 times (30 sts)

R7: *SC 4, 2 SC in next st* rep 6 times (36 sts)

R8-R11: SC around (36 sts)

Bind off, leaving a long tail for sewing.


FLESH OF FRUIT (make 2)

R1: With cream  yarn, 6 SC in magic loop, sl st to close.

Switch to crimson yarn.

R2: CH 1, 2 SC in each st around, sl st to close (12 sts)

R3: CH 1,  *SC 1, 2 SC in next st* rep 6 times, sl st to close (18 sts)

R4: CH 1,  *SC 2, 2 SC in next st* rep 6 times, sl st to close (24 sts)


R5: CH 1,  *SC 3, 2 SC in next st* rep 6 times, sl st to close (30 sts)

R6: Switch to cream yarn. CH 1,  *SC 4,  2 SC in next st* rep 6 times, sl st to close (36 sts) Bind off.

Embroider fruit segments with cream yarn, and attach magnets to underside if desired. Sew to rind, stuffing when almost sewed shut, then finish up. Weave in ends. 

Wednesday, May 23, 2012

Pink grapefruit!

Yet another citrus fruit, and my favorite, pink grapefruit! I did not magnetize these because I ran out of magnets, but obviously just sew some in if you want magnetic grapefruit. 


MATERIALS


  • G hook
  • Worsted weight yarn in hot pink, pastel yellow, and cream.
  • Embroidery needle
  • Fiber fill
  • If desired, magnets that are strong enough to hold through yarn.


RIND (make 2)


R1: With pastel yellow yarn, 6 SC in magic loop.


R2: Inc every ST (12 sts)


R3: *SC 1, 2 SC in next st* rep 6 times (18 sts)


R4: *SC 2, 2 SC in next st* rep 6 times (24 sts)


R5: *SC 3, 2 SC in next st* rep 6 times (30 sts)


R7: *SC 4, 2 SC in next st* rep 6 times (36 sts)


R8: *SC 5, 2 SC in next st* rep 6 times (42 sts)


R9-R12: SC around (42 sts)


R13: *SC 13, 2 SC in next st* rep 2 times (45 sts)


Bind off, leaving a long tail for sewing.


FLESH OF FRUIT (make 2)


R1: With cream  yarn, 6 SC in magic loop, sl st to close.


Switch to hot pink yarn.


R2: CH 1, 2 SC in each st around, sl st to close (12 sts)


R3: CH 1,  *SC 1, 2 SC in next st* rep 6 times, sl st to close (18 sts)


R4: CH 1,  *SC 2, 2 SC in next st* rep 6 times, sl st to close (24 sts)


R5: CH 1,  *SC 3, 2 SC in next st* rep 6 times, sl st to close (30 sts)


R6: CH 1,  *SC 4, 2 SC in next st* rep 6 times, sl st to close (36 sts)


R7: CH 1,  *SC 5, 2 SC in next st* rep 6 times, sl st to close (42 sts)


R8: Switch to cream yarn. CH 1,  *SC 6,  2 SC in next st* rep 6 times, sl st to close (48 sts) Bind off.


Embroider fruit segments with cream yarn, and attach magnets to underside if desired. Sew to rind, stuffing when almost sewed shut, then finish up. Weave in ends. 

Sunday, April 29, 2012

OH MY GOD

I have to share my excitement and joy! I made bread, and it didn't totally suck. It sucks a little because I made it collapse so it's not risen correctly and it's too salty, BUT

my bread is soft. It's not a gross hockey puck wheat cake. It's soft and fluffy and still like 95% whole wheat. Take that and fuck you Healthy Bread in Five Minutes a Day.


I used the recipe found here: http://littlebluehen.com/?p=950

Magnetic lemon


I finished this eons ago, but I'm a terrible blogger. LIFE. IT HAPPENS. 

Just a warning, I did not write this pattern down as I was making it, but it's nearly identical to the lime, just a bit bigger, so I adjusted accordingly. If it comes out wonky, let me know!


MATERIALS

G hook
Worsted weight yarn in school bus yellow, lemon green, and cream.
Embroidery needle
Fiber fill
If desired, magnets that are strong enough to hold through yarn.

One half of rind:

R1: With school bus yellow yarn, 4 Sc in magic loop.

R2: Inc every other st (6 sts)

R3: SC around (6 sts)

R4: Inc every st (12 sts)

R5: *SC 1, 2 SC in next st* rep 4 times (18 sts)

R6: *SC 2, 2 SC in next st* rep 4 times (24 sts)

R7: *SC 3, 2 SC in next st* rep 4 times (30 sts)

R8: *SC 4, 2 SC in next st* rep 4 times (36 sts)

R9: *SC 5, 2 SC in next st* rep 5 times (42 sts)

R10-R13: SC around (42 sts) Bind off

Second half of rind:

R1: With school bus yellow yarn, 4 Sc in magic loop.

R2: Inc every other st (6 sts)

R3: Inc every st (12 sts)

R4: *SC 1, 2 SC in next st* rep 4 times (18 sts)

R5:* SC 2, 2 SC in next st* rep 4 times (24 sts)

R6: *SC 3, 2 SC in next st* rep 4 times (30 sts)

R7: *SC 4, 2 SC in next st* rep 4 times (36 sts)


R8: *SC 5, 2 SC in next st* rep 5 times (42 sts)


R9-R13: SC around (30 sts)

Bind off


Flesh of fruit (make 2):

R1: With cream  yarn, 4SC in magic loop, sl st to close.

Switch to lemon yellow yarn.

R2: CH 1, 2 SC in each st around, sl st to close (8 sts)

R3: CH 1,  *SC 1, 2 SC in next st* rep 4 times, sl st to close (12 sts)

R4: CH 1,  *SC 2, 2 SC in next st* rep 4 times, sl st to close (16 sts)

*R5: CH 1,  *SC 3, 2 SC in next st* rep 4 times, sl st to close (20 sts)

R6: CH 1,  *SC 4, 2 SC in next st* rep 4 times, sl st to close (24 sts)

*This is where it gets a little fuzzy for me. You might have to eyeball what's going to fit. If you make the flesh and it's too small, then just keep increasing until it's the right size. If it's too big, rip out a round! It's easy to fix no matter what.

Switch back to cream yarn

R7: CH 1,  *SC 5, 2 SC in next st* rep 4 times, sl st to close (28 sts)

Bind off, embroider sections of fruit with cream yarn. Attach magnets to underside if
desired by sewing in tightly. Attach to rind and sew 3/4 of the way around, stuff, then finish sewing shut. Weave in ends.


Can I just say that blogger's formatting totally blows? My entries look fine in edit mode, but they go wonky when I publish. 


Friday, March 16, 2012

Pear Jam with Honey & Vanilla


Aldi had these 2lb bags of pears for $1 each, so I bought FOUR bags because I'm crazy. Also, you can make fun of me for shopping at Aldi, but then you can also kiss my ass for being a giant jerk face.  That said, I'm obsessed with canning, which is pretty funny because I think it's the new hipster, "homesteading", band wagon home craft. I'm an insufferable hipster wannabe, so of course, I love canning, and I'm tired of buying jams and jellies that are either cheap and filled with a zillion ingredients, or cost $4 for one tiny 8 oz jar because it's so ~pure and natural~. My little girl and I eat a lot of jam, I want to know what my little girl is eating. I also love jam because it's the whole fruit, minus the skins usually, so you're still getting all the good stuff from the fruit like fiber and nutrients!


My husband ate an entire bag of pears and left me with 3 lbs, so I made jam with what was left.


3 lbs of pears
1/2 cup water
1 cup honey
1/2 cup lemon juice
1/4 cup + 3 tbsp Ball Low Sugar Pectin
1 tbsp pure vanilla extract, or a couple vanilla beans scraped.


Peel, core, and chop up ripe pears. I just quartered mine because I'm lazy and have an immersion blender. Combine pears and water in a large pot and cook until soft, then mash or use an immersion blender to get a chunky puree. (At this point, I ladled all of my fruit out into a huge measuring cup so that I could get exact amounts needed for pectin and lemon juice. I ended up with just barely 9 cups of pear puree, and with lemon juice added, that would be 9 cups of liquid even, which is how I ended up with my pectin amount. I just followed the directions on the label of the pectin jar.) Add lemon juice, and gently stir in pectin, a little bit at at time and stirring constantly. You want to avoid any lumps. Bring to a rapid boil on high heat that cannot be stirred down, then add honey and vanilla. Bring back to a rapid boil, let boil for about 1 min, then remove from heat. Pack into sterile, hot jars, seal, and process in a boiling water bath for 10 minutes. Let jars sit for 12-24 hours after processing, I lay a towel out on my counter and leave them there overnight.


This recipe is heavily based on the directions on the Ball Low Sugar pectin label, so it should be safe afaik. The only changes I made were adding vanilla.

Monday, January 30, 2012

I do a lot more besides twattle around with yarn. This is now a ~*Domestic Arts*~ blog.

Friday, November 4, 2011

Magnetic Lime

Yeah yeah yeah, I know it's been forever.


MATERIALS
  • G hook
  • Worsted weight yarn in green, neon green, and cream.
  • Embroidery needle
  • Fiber fill
  • If desired, magnets that are strong enough to hold through yarn.


One half of rind:


R1: With green yarn, 4 Sc in magic loop.

R2: Inc every other st (6 sts)

R3: SC around (6 sts)

R4: Inc every st (12 sts)

R5: *SC 1, 2 SC in next st* rep 4 times (16 sts)

R6: *SC 2, 2 SC in next st* rep 4 times (24 sts)

R7: *SC 3, 2 SC in next st* rep 4 times (30 sts)

R8-R11: SC around (30 sts) Bind off

Second half of rind:


R1: With green yarn, 4 Sc in magic loop.


R2: Inc every other st (6 sts)


R3: Inc every st (12 sts)


R4: *SC 1, 2 SC in next st* rep 4 times (18 sts)


R5:* SC 2, 2 SC in next st* rep 4 times (24 sts)


R6: *SC 3, 2 SC in next st* rep 4 times (30 sts)


R7-R11: SC around (30 sts)


Bind off


Flesh of fruit (make 2)


R1: With cream  yarn, 4SC in magic loop, sl st to close.


Switch to neon green yarn.


R2: CH 1, 2 SC in each st around, sl st to close (8 sts)


R3: CH 1,  *SC 1, 2 SC in next st* rep 4 times, sl st to close (12 sts)


R4: CH 1,  *SC 2, 2 SC in next st* rep 4 times, sl st to close (16 sts)


Switch back to cream yarn


R5: CH 1,  *SC 3, 2 SC in next st* rep 4 times, sl st to close (20 sts)


Bind off, embroider sections of fruit with cream yarn. Attach magnets to underside if
desired by sewing in tightly. Attach to rind and sew 3/4 of the way
around, stuff, then finish sewing shut. Weave in ends.

Wednesday, October 12, 2011

The secrets of knitting, REVEALED!!!!

This post is not meant to be an instructional, How-To on knitting. Rather, I hope to clear up some confusion for new knitters who are are unsure if they're doing it right. I think most people understand the basic stitch, but they're so shitty at first that that misshapen, lumpy, loose knot makes them doubt that they're actually doing it right.

I mean, think about knitting. Think about how ridiculous it is. You are using slippery sticks as your hands. That is ridiculous. Your body and brain are saying "What, are you fucking stupid? Use your fucking hands for this jackass." and it takes a lot of practice to get that coordination down so that the movements are fluid and the stitches have an even gauge and don't look like a grandma vagina.

So, I will take you on a journey, complete with terribly drawn diagrams that I drew on my tablet at 1:00 am last night because I couldn't sleep. I'm hoping you will gain a basic understanding of HOW the stitch works, and what it is broken down. I'm not going to show you how to hold your needles or yarn, that's something that comes with time and practice and there is no real "right" way, it's all about what's comfortable for you.

So, this is what a knit stitch is, basically. It's pulling yarn through a loop to make a fancy ladder of sort of slip knots. 
I think a lot of knitting diagrams are too cluttered. They're showing the WHOLE picture, complete with rows of stitches and the needles. Strip all that away, and it becomes so clear what you're trying to do. You will be pulling one loop through another. That's it! But, you're going to be using needles as hands and your body will hate that, so you will suck at it. I'm sorry, there is nothing to be done about that, you will be shit for awhile, but it gets better with practice!
So we've added our fabulously detailed knitting needles (the crappy purple sticks). That red wavy thing is the length of yarn that you will use to make the loop on the RIGHT that you will pull through the black loop on the LEFT. But how does this work? And who the hell thought of this anyway? What human said "hmm I think I'll make up a clumsy, illogical way to weave using sticks instead of hands!"

So before we even address the wavy, red squiggle yarn issue, we need to make sure we're doing the right things with our needles. You are going to pick up your RIGHT needle, and insert it into the loop on the LEFT needle from front to back. Your needles goes over the right thread of the loop, then under the left thread of the loop. If you stick your needle right in the middle of the loop (which seems like the right thing to do at first glance, I know, I knit a whole scarf like this as a new knitter before realizing I was doing it wrong) then your stitch will be twisted and look like an AIDS ribbon. Some patterns actually call for a twisted stitch because it can be decorative, but it's not something you would normally do. 
So now we address that squiggly yarn.
After you have successfully positioned the right needle into the loop on the left needle, you are going to wrap the yarn around the needle on the right as pictured above. BACK to FRONT.
Now this is the hard and awkward part. You are going to pull that loop you made on the right needle THROUGH the loop on the left needle. This is going to feel awkward at first, and probably for awhile too. It will take you 20 minutes to knit one row at first because you're going to suck, and then to top it off, your stitches are going to look like shit. Just expect it, it's ok. We were all shitty knitters once ourselves. 
Then, as icing on the cake, you are going to remove your left needle from the original loop you had on the left. This might be even more awkward and difficult than wrapping the yarn and pulling it through! You get to do this each and every time you knit a stitch. You will probably drop the stitches a lot and fuck this up and have to start over a ton and be really frustrated. This is just what happens, it's ok. 


The knit stitch in itself is a very simple concept, but it's the execution that gets you. Chances are, you're probably doing it right, but you're a noob so you suck. It's such a cliche, but the only way you're going to get better is through practice. Not one person picks up needles and knits well for the first time. 

A couple tips to help save your sanity.
  • Don't attempt to knit A Project the first time you pick up the needles. Knit and knit and knit until you feel more comfortable and your stitches don't look so much like dog doo anymore, then rip it all out, start over, and make a nice garter stitch scarf. (Garter stitch is when you knit every single row. If you want those flat, neat V stitched fabrics, you will have to learn how to purl too, which is actually just knitting backwards.)
  • The sides of your work are probably going to be saggy and loose. To help avoid this, pull the yarn a little tight with every first stitch in a new row. I wish someone had told me this when I started, I had some very ugly sides.
  • I knit holding my string of yarn in my right hand and "throw" the loop over the needle, which is called English knitting. This is probably the more awkward way to knit for a beginner, tbh, it's just what I'm used to. There is another method called Continental where you hold the string of yarn in your LEFT hand and never have to throw a loop. Once you understand the basic mechanisms of the knit stitch, look up Continental and see if it works better for you.


Good luck, knitting babies. I hope this has helped ease some confusion with SOMEONE out there.


Monday, August 1, 2011

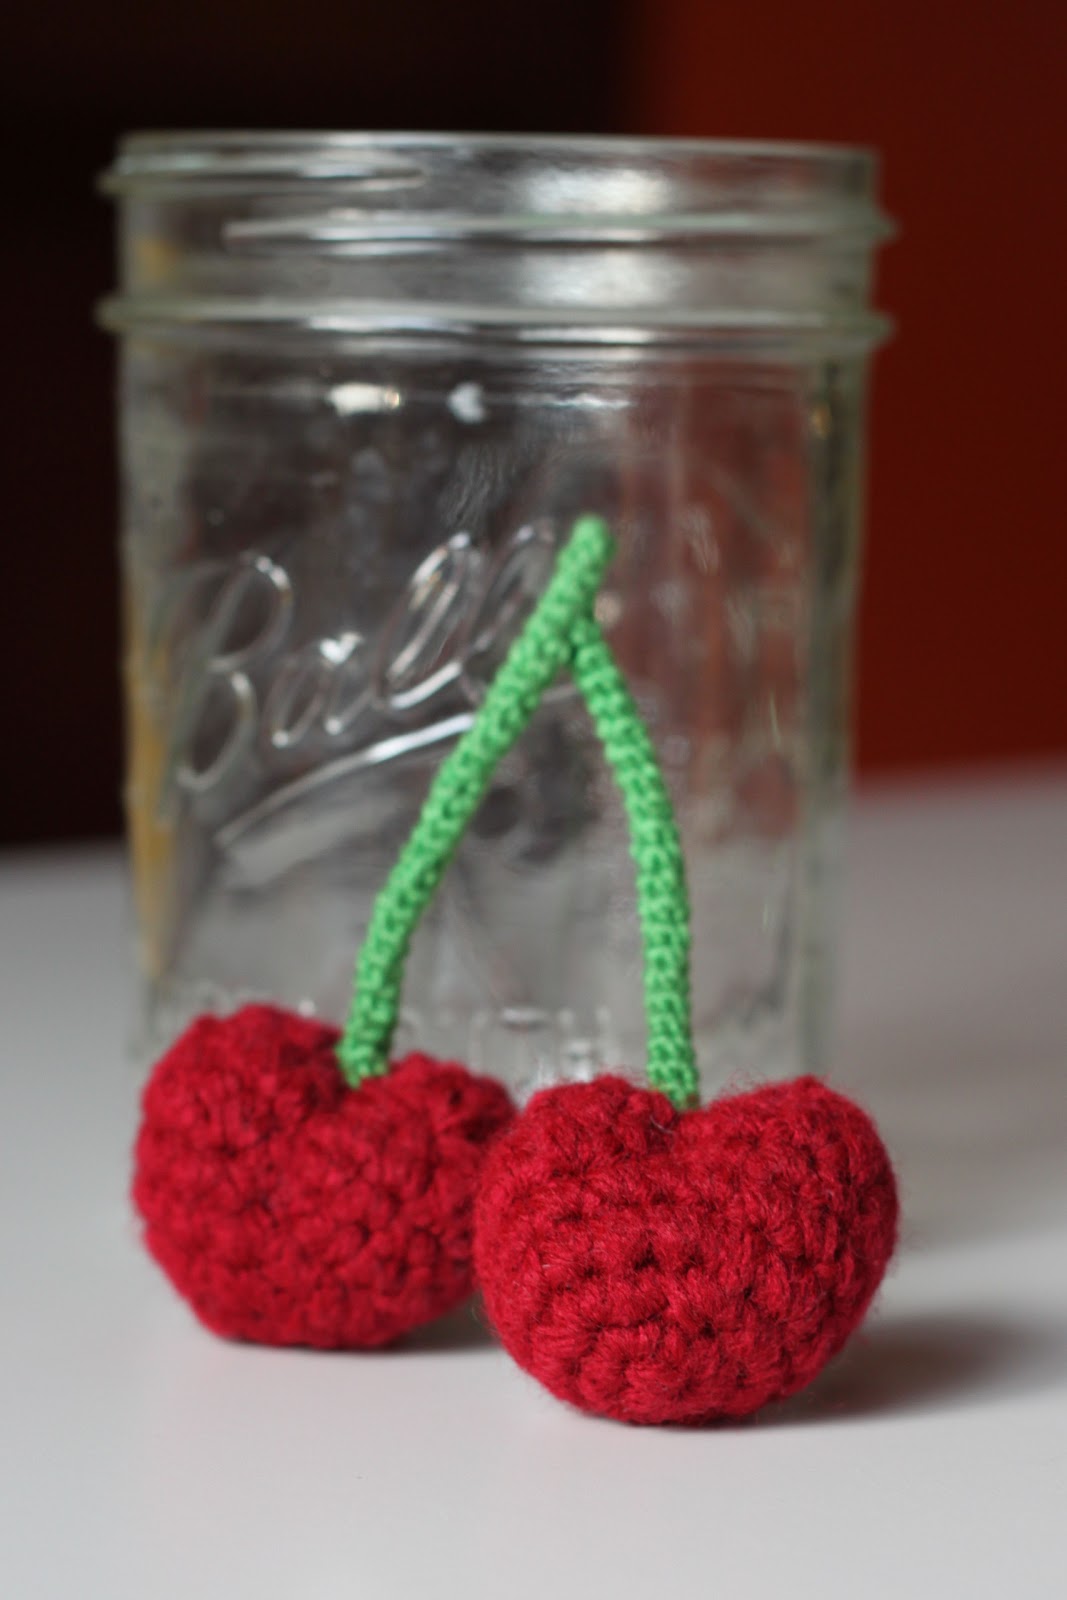
Cherries


MATERIALS
  • G Hook
  • 8 Hook
  • Worsted weight yarn in deep red
  • Green embroidery floss
  • Embroidery needle
  • Fiber fill
FRUIT

R1: With G hook, 6 SC in magic loop

R2: 2 SC in every st (12 sts)

R3: *SC 1, 2 SC in next st* rep 6 times (18 sts)

R4-R5: SC around (18 sts)

R6: SC 1, HDC in next two sts, DC in next three sts, HDC in next two sts, SC 1. Repeat for next nine sts.

R7: *SC 1, dec 1* rep 6 times (12 sts)

At this point, stuff with fiber fill.

R8: SC in every other st, bind off leaving long tail for sewing. (6 sts)

Thread embroidery needle, push it down into the middle of the cherry, and then out about 1/3 of the way down the side of the  fruit. You also want to make sure you push it out so its positioned parallel to the two SCs in the shaping row. Pull the yarn up, push it back down through the top of the cherry, and out the other side about a 1/3 of the way down, pulling tightly to create one side of  the ridge cherries have. Bring the yarn back to the top, push it down through the middle, and out of the side, right near the first ridge you made. I wove a tiny stitch there, and pushed the needle back up through the top, pulling tightly. Make a little, tight knot (the stem will hide it), then weave in ends. 

STEM

With 8 hook and green embroidery floss, CH 4, join in a ring. SC in each st around to create a tube. SC around until stem reaches desired length. Attach to cherry and weave in ends.

You can make two of each, sew the stems together, and attach to cherries to make what I made in the picture. 


Friday, July 29, 2011

Strawberry

7/30/2011: I totally fucked up and wrote this pattern at like midnight and it's all messed up am fixing it right now.

7/30/2011: ALL FIXED YAAAY


MATERIALS
  • G Hook
  • F Hook
  • Worsted weight yarn in red, green, and white
  • Tapestry needle
FRUIT

With G Hook

R1: 5 Sc in magic loop.

R2: 2 SC in each st around (10 sts)

R3: SC around (10 sts)


R4: *SC 1, 2 SC in next st* rep 5 times (15 sts)

R5: SC around (15 sts)

R6: *SC 2, 2 SC in next st* rep 5 times (20 sts)

R7: SC around (20 sts)

R8: *SC 3, 2 SC in next st* rep 5 times (25 sts)

R9-R11: SC around (25 sts)

R12: *SC 3, dec 1* rep 5 times (20 sts)

At this point, hold live stitch with a safety pin. Start to embroider seeds, spacing them along evenly around the fruit, until you get up to the live st. Stuff with fiber fill, but leave a bit of room at the top. Pick st back up.

R13: *SC 2, dec 1* rep 5 times (15 sts)

R14: *SC 1, dec 1* rep 5 times (10 sts)

Finish embroidering seeds, then stuff completely with fiber fill.

R15: SC in every other st, bind off. (5 sts) Because the top of my fruit is going to be hidden by leaves, I tie a strong knot, then I weave in the ends.

LEAVES

With F hook

R1: 5 sc in magic loop

R2: 2 sc in every sts, sl st to close round (10 sts)

R3: Ch 5, sl st in second ch from hook, sc in next ch, hdc in next to chs, sl st in next st. Repeat around until you have 10 leaves. Bind off, leaving long tail for sewing. Attach leaves to top of strawberry, weave in ends.

All done!


Sunday, July 24, 2011

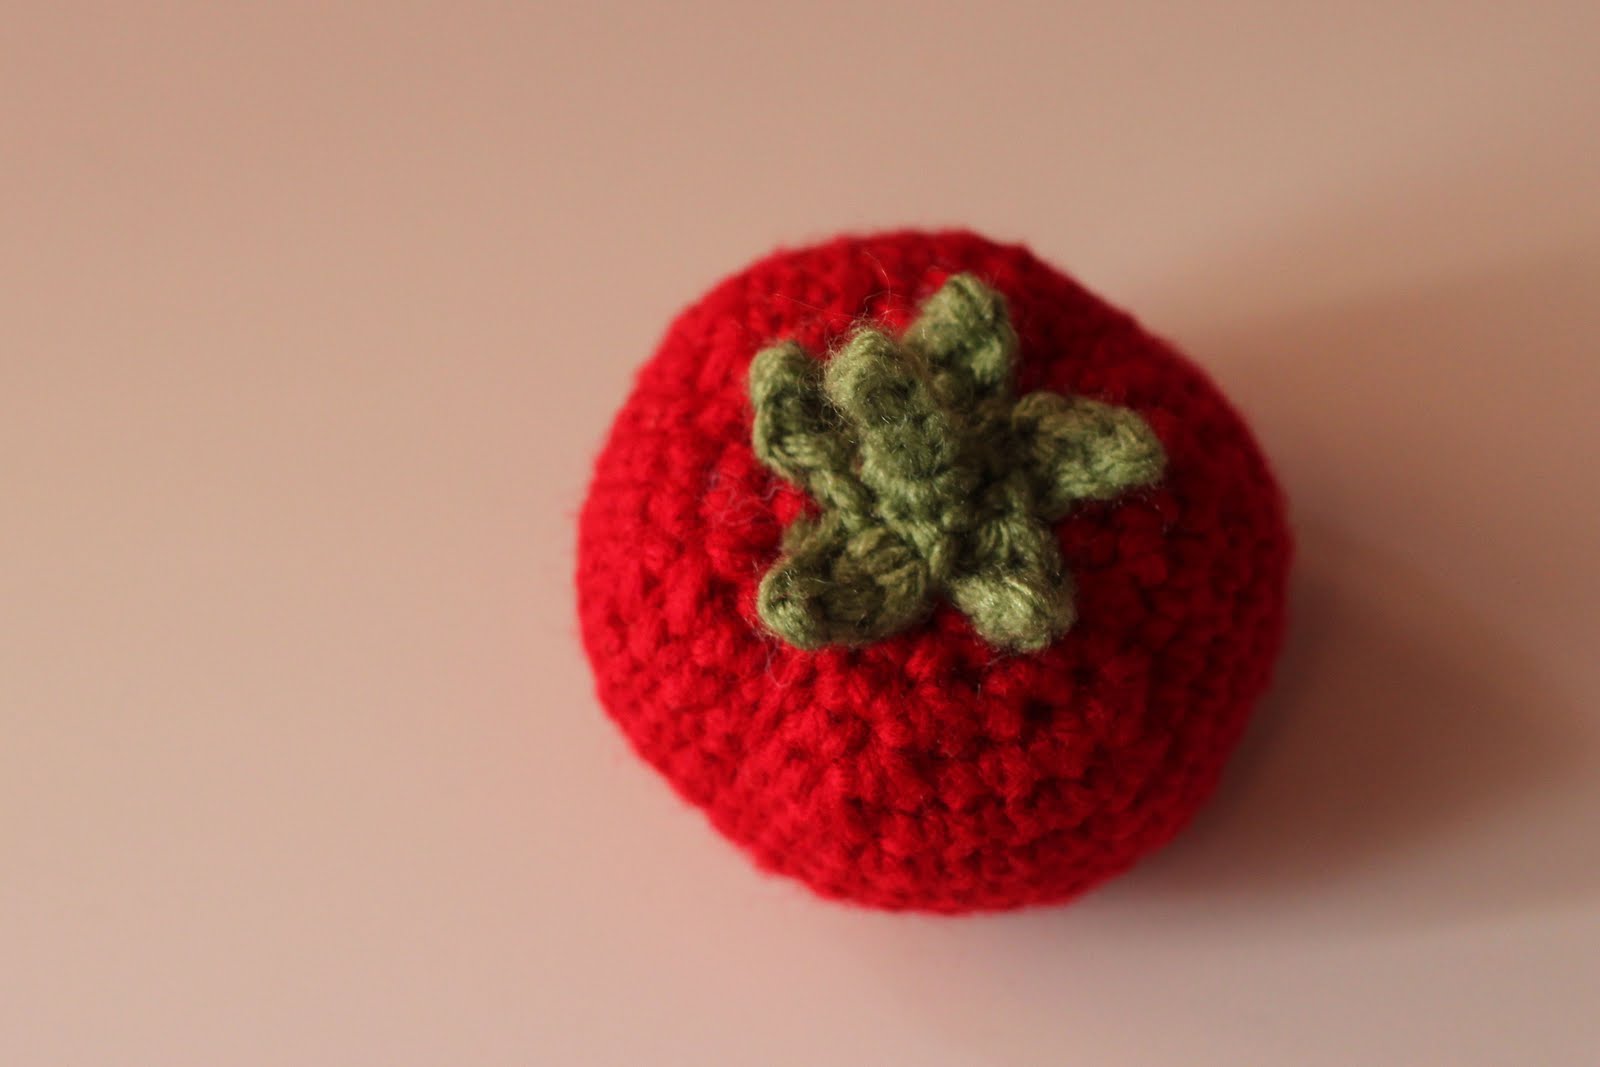
Tomato


MATERIALS

  • Worsted weight yarn in red and green
  • Size G hook
  • Tapest needle
  • Fiber fill


FRUIT


R1: SC 6 sts into magic ring, pull closed

R2: 2 SC in each st around (12 sts)

R3: *SC 1, 2 SC in next st* rep 6 times (18 sts)

R4: *SC 2, 2 SC in next st* rep 6 times (24 sts)

R5: *SC 3, 2 SC in next st* rep 6 times (30 sts)

R6: *SC 4, 2 SC in next st* rep 6 times (36 sts)


R7-R10: SC around (36 sts)


R11: *SC 4, dec 1* rep 6 times (30 sts)

R12:  *SC 3, dec 1* rep 6 times (24 sts)

R13:  *SC 2 dec 1* rep 6 times (18 sts)

At this point, stuff with fiberfill.

R14:  *SC 1, dec 1* rep 6 times (12 sts)

R15: SC in every other stitch. (6 sts)


Bind off and leave a long tail.


With an embroidery needle, take yarn and thread it about 1/3 of the way down the tomato, then back up the through middle, pulling tightly. Do the same thing three times equally around in a cross, then tie a knot and cut. You don't need to weave in ends because you're going to be sewing the stem to the top and hiding your mess, just make sure you have a good knot. This creates the ridges in  the tomato.


LEAVES


R1: 5 SC in magic loop, pull to close.


R2: Slip stitch in first st, chain 4, sl st in 2nd ch from hook, SC in next chain, HDC in last ch. Sl st in next st and repeat around until you have 5 leaves. Bind off, leaving tail for sewing.


STEM


Ch 5, sl st in 2nd ch from hook and all the way down, bind off and leave a tail for sewing.. With crochet hook, thread top stem through the magic ring in the leaves, leaving the tails on the underside. Secure the stem to the leaves on the underside by sewing them together and knotting underneath. 


Sew stem and leaves to tomato, but don't sew the leaves all the way down so that the tips curl up. Looks more realistic that way! Weave in ends, bind off.